Create a new blank database – give it a name and save it somewhere on your local drive.
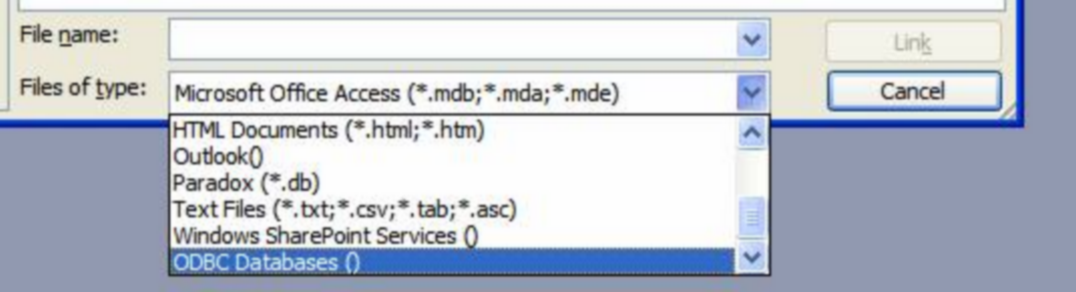
Then, choose File-Get External Data-Link Tables
In the file dialog box that comes up, choose ODBC in the files of type drop-down:
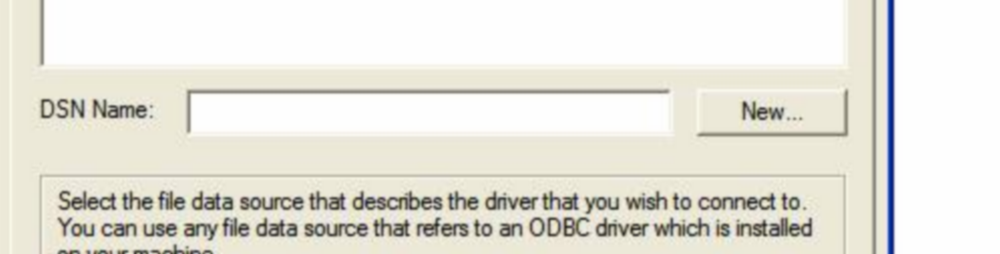
Choose “New” to create a new DSN
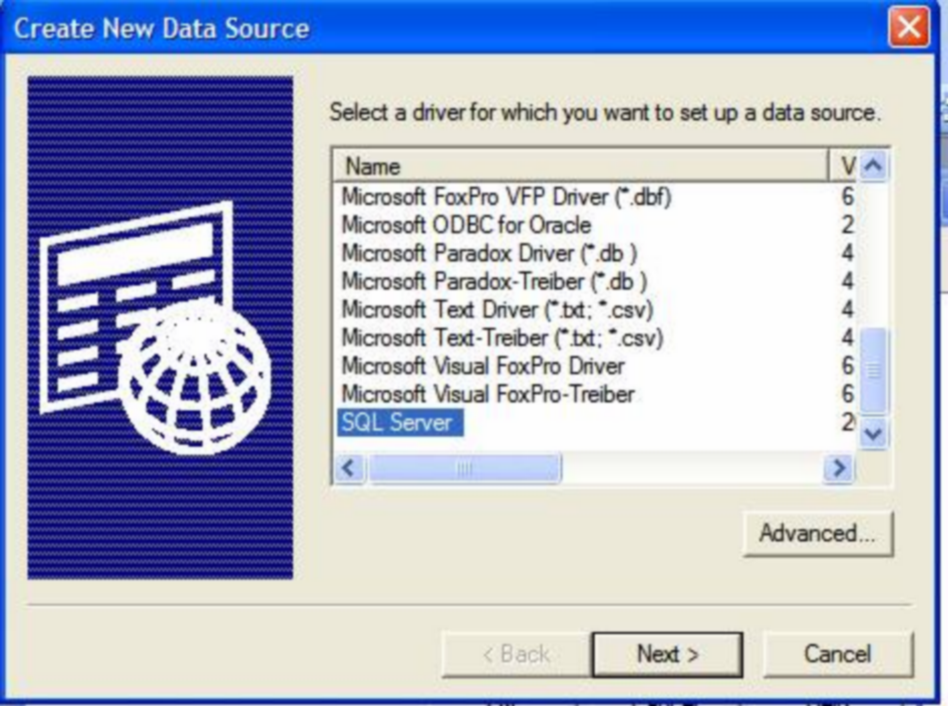
Go to bottom and choose SQL Server, click next
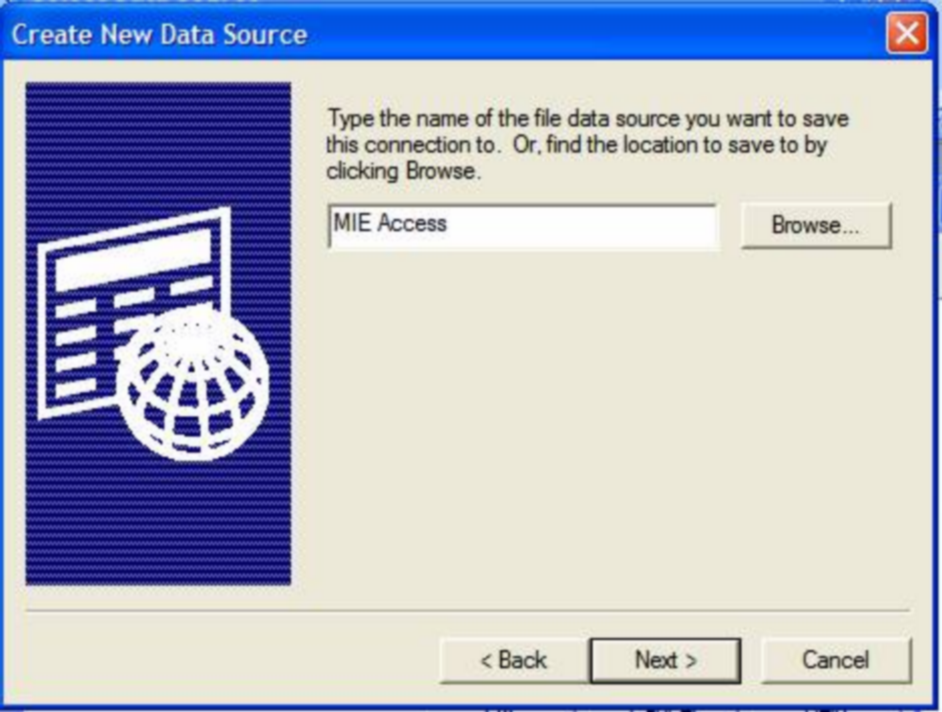
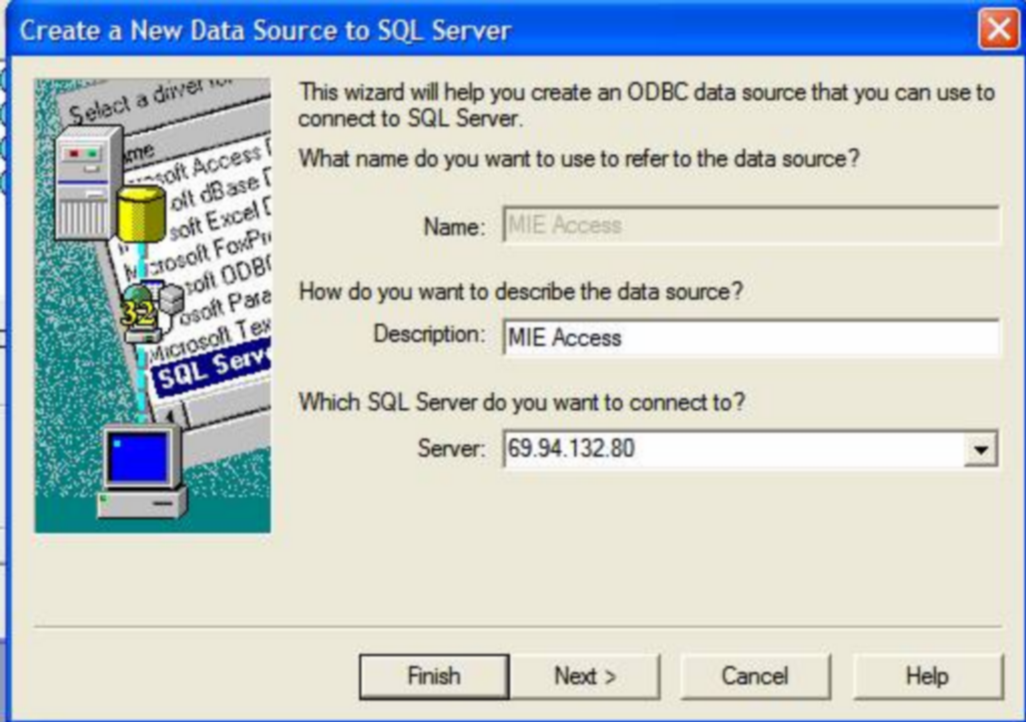
Give the DSN a name, click next
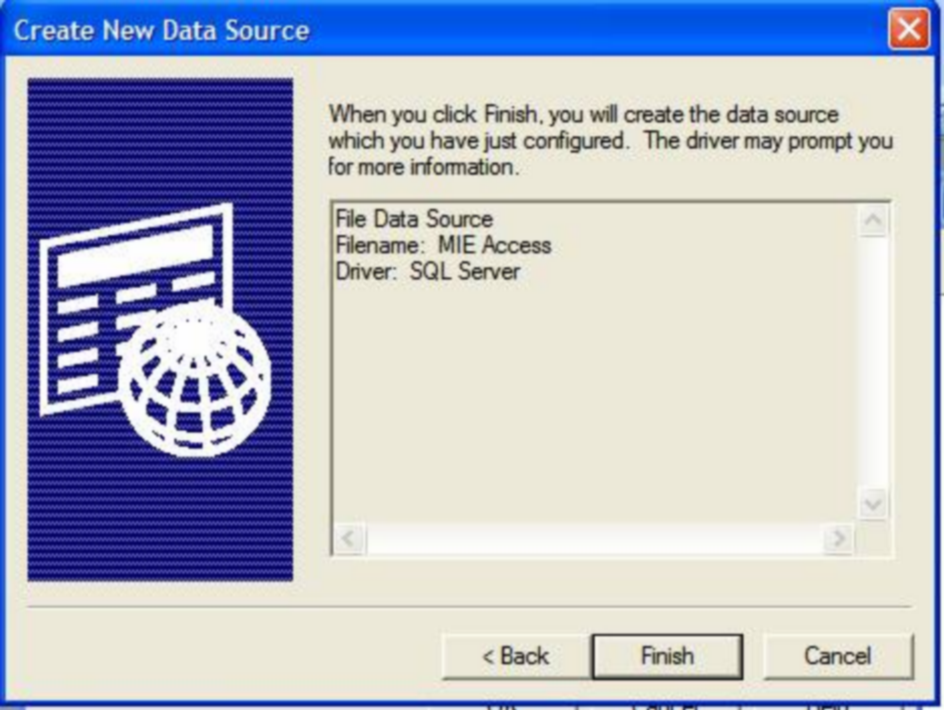
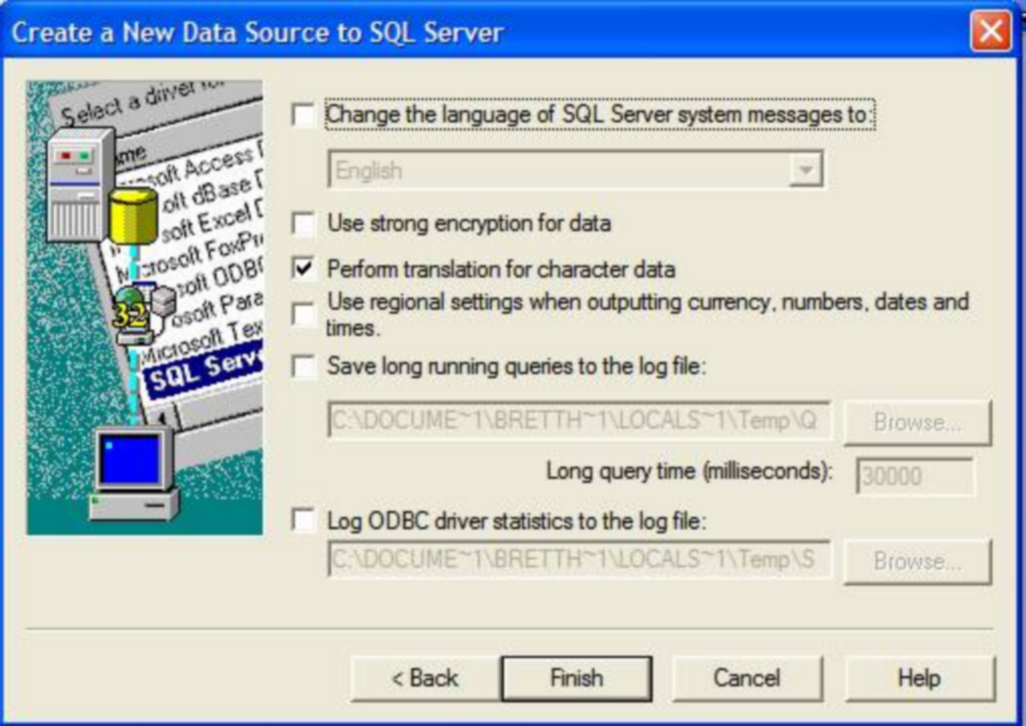
Click Finish
Enter in a description and the server IP address, click Next
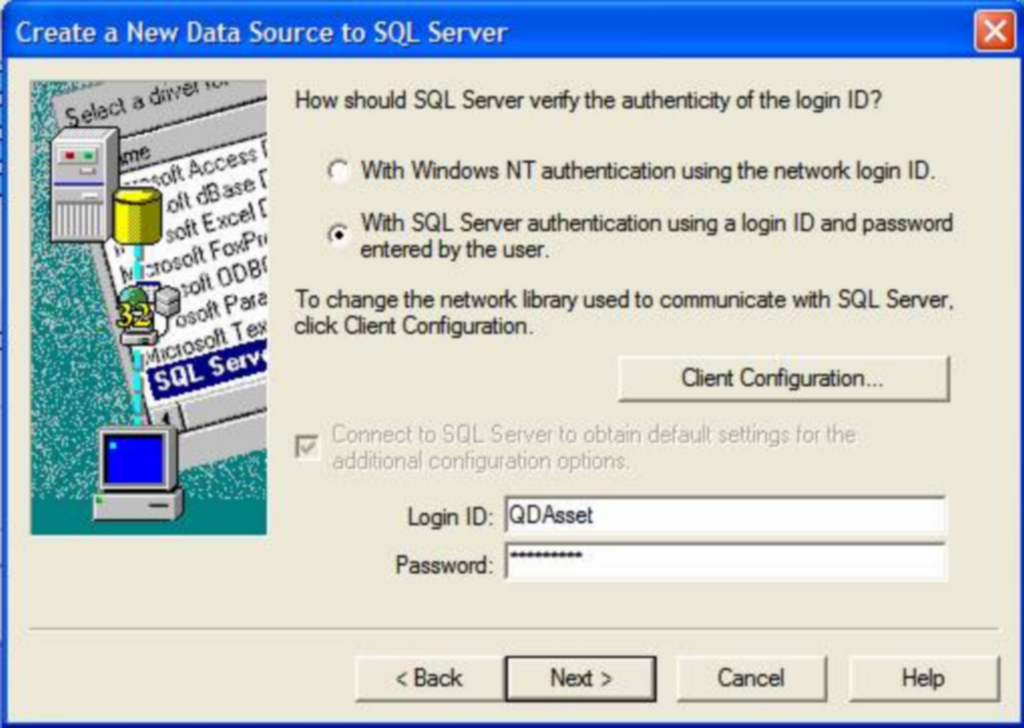
Choose “With SQL Server authentication …”, then enter the userID and PWD you were given to access the view.
Click Next.
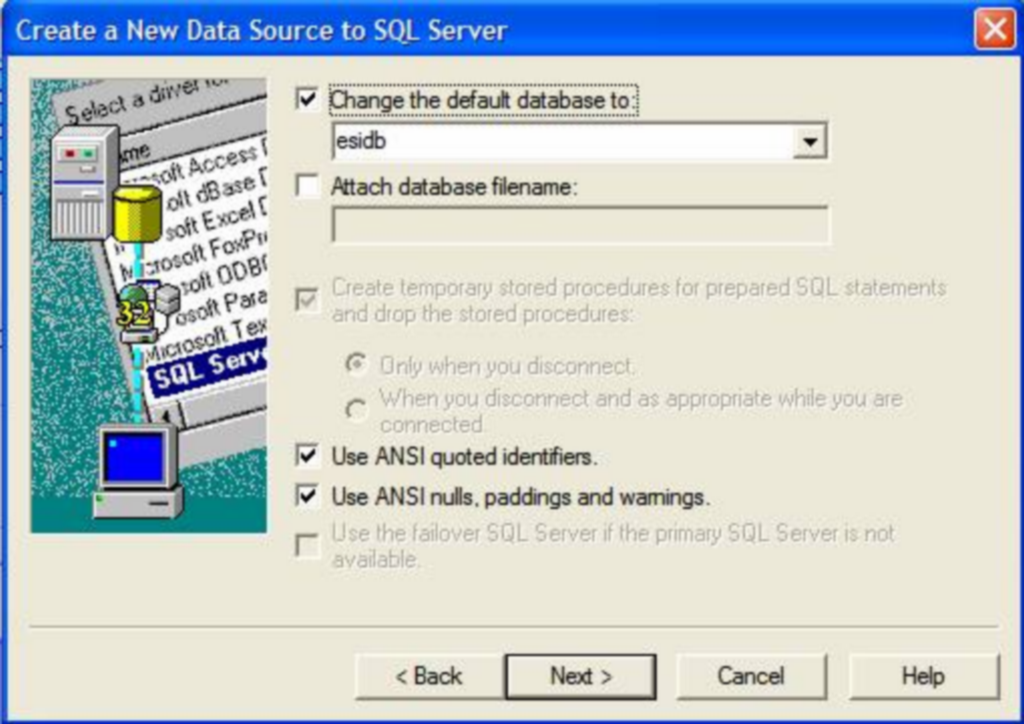
Click the box “Change the default database to:”. Make sure esidb is selected. Click Next
Click Finish
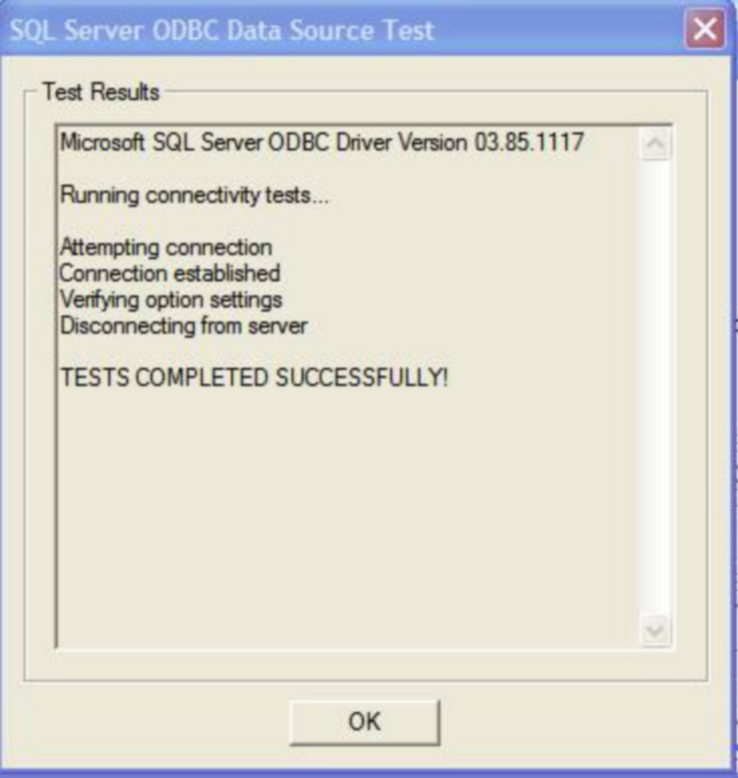
Click Test Data Source – make sure your test was successful.
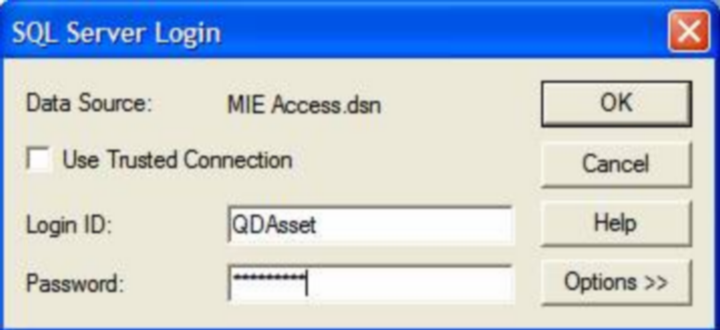
You now have a way to access the SQL server through Access. Now you just need to link the tables in the view.
You will be challenged for the connection password again. Enter it.
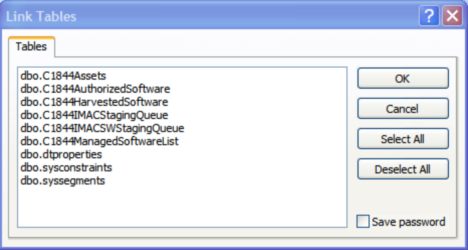
Choose all the tables in the view that begin with C<nnnn> (where <nnnn> is a number). Click OK
As each table is processed, you will receive a pop-up from Access asking for the primary key. The tables in the view are all read-only, so simply choose the first field in the list presented and click OK.

After choosing a primary key for all tables, you will be finished.
You now have linked tables in Access and you can use all of Access’s User Interface – but the data is being read directly from the SQL server on the MIE.